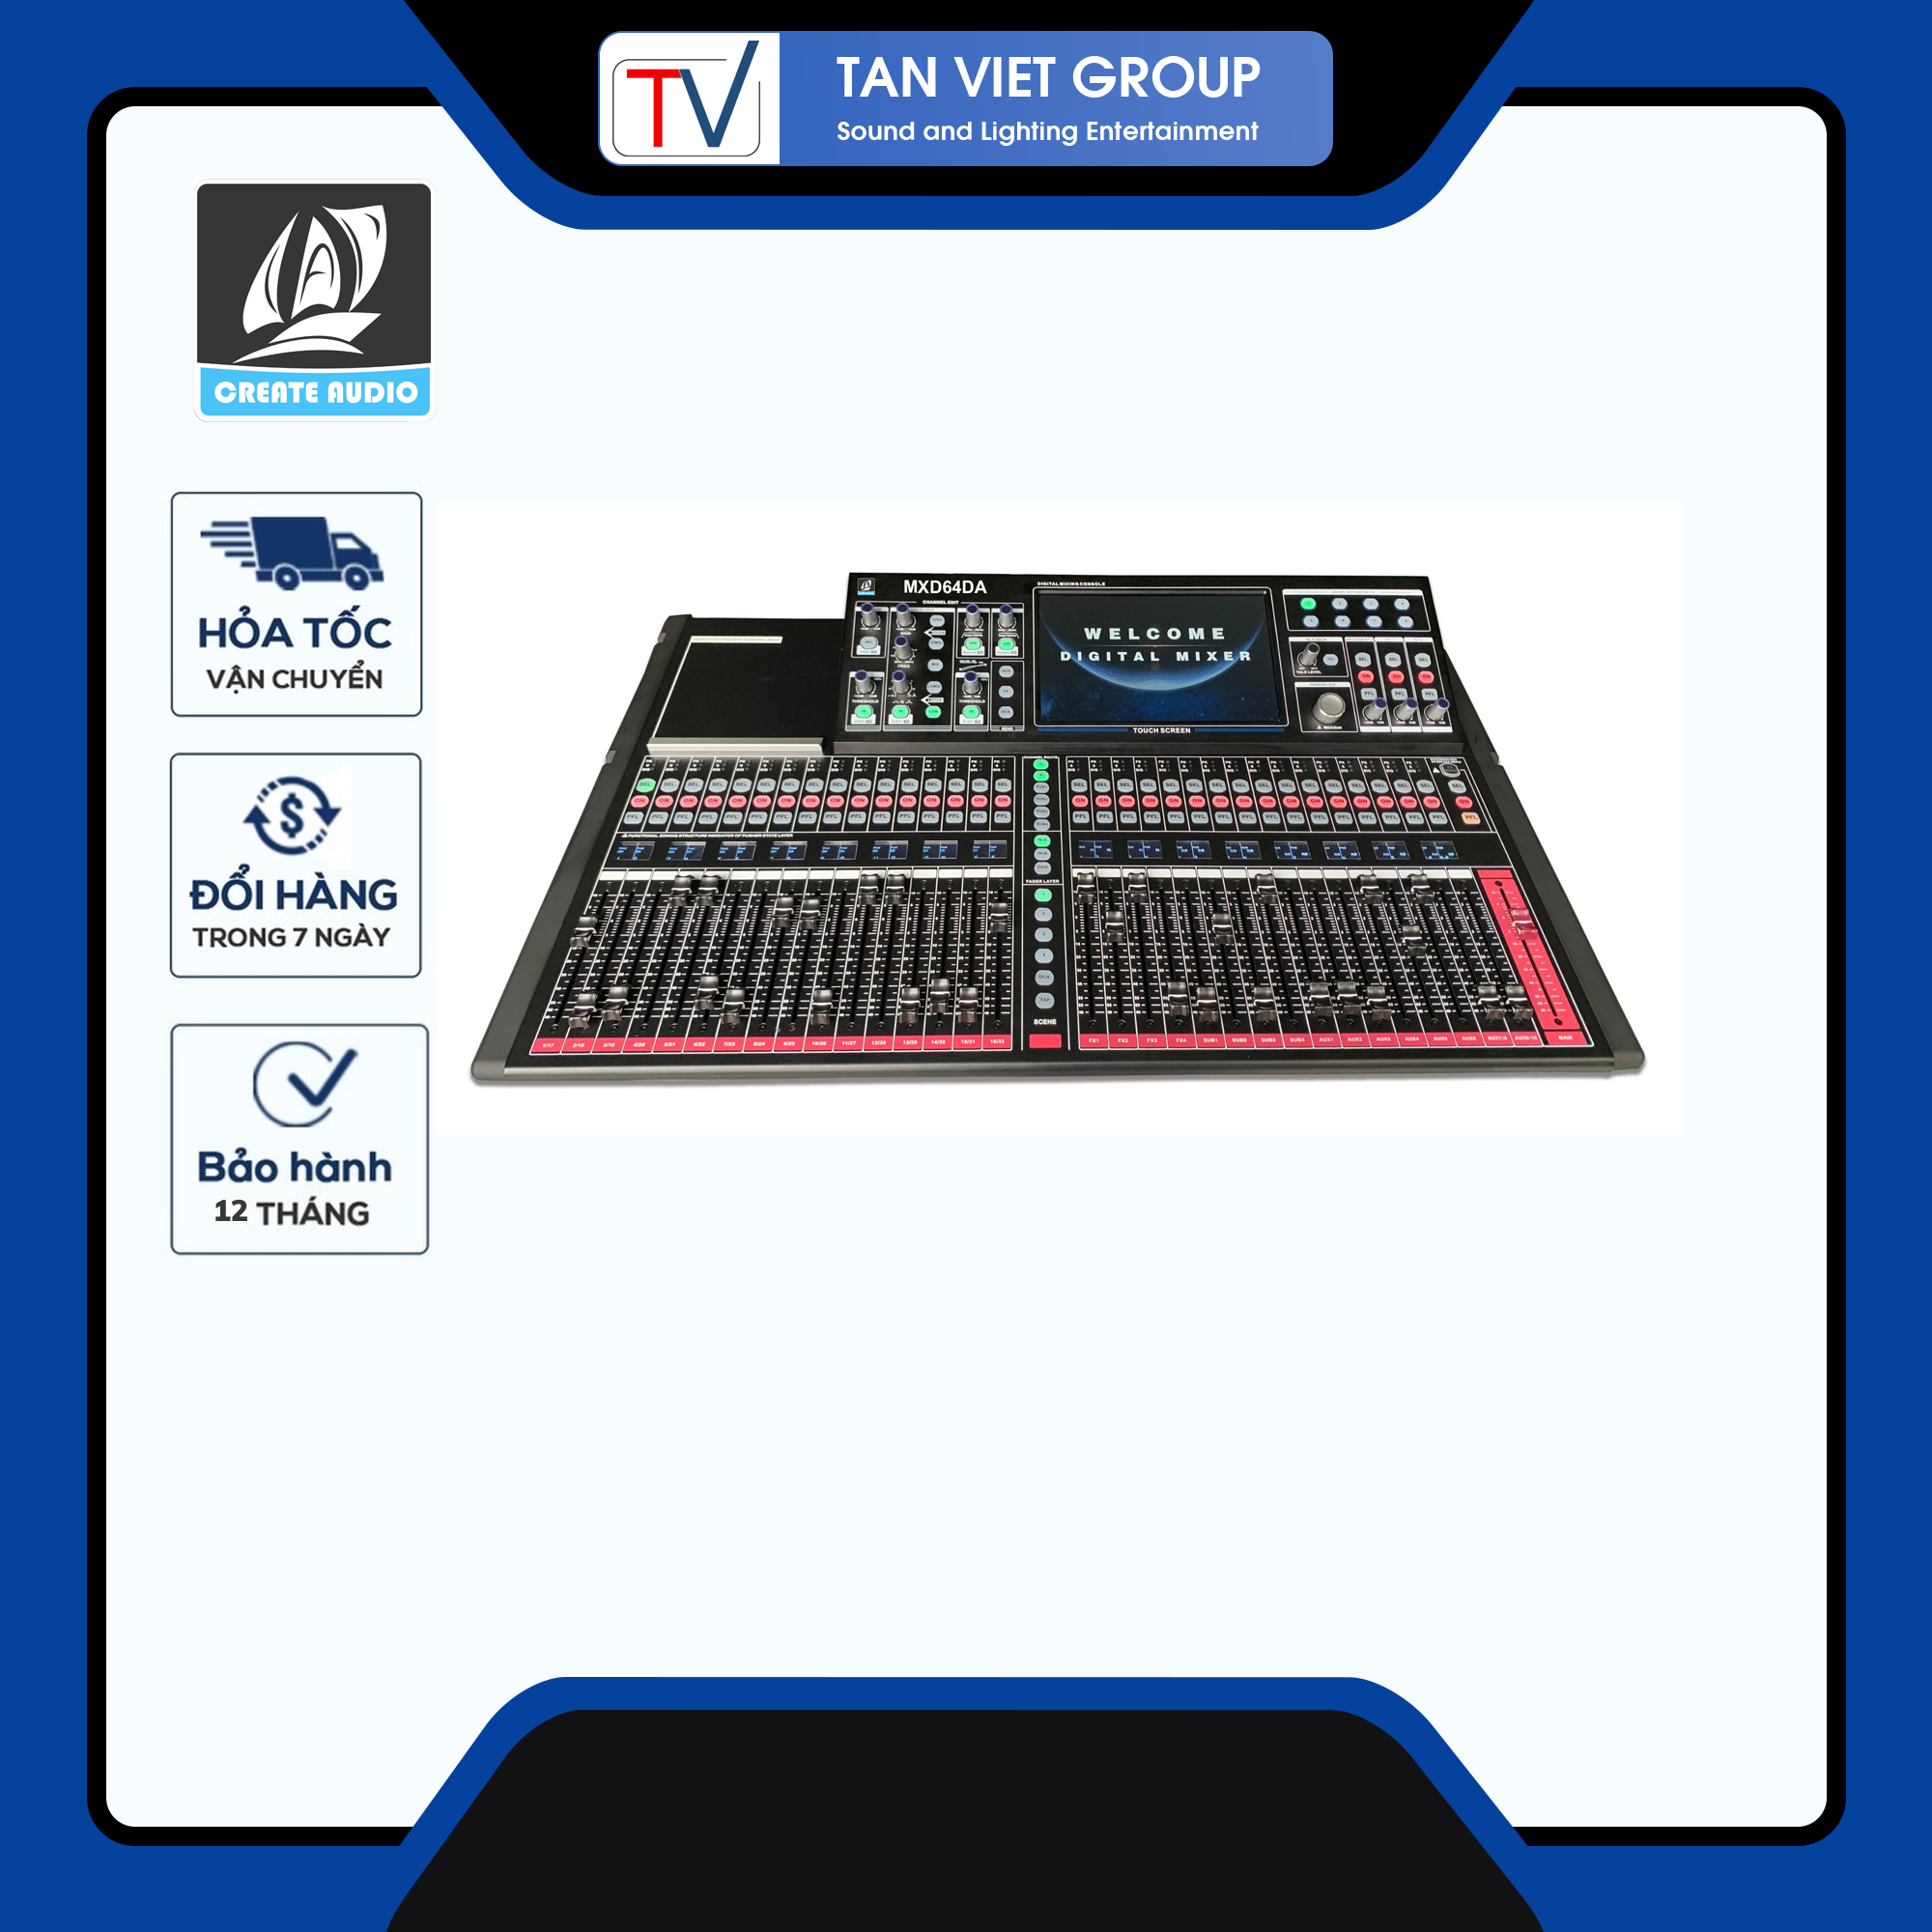
Mixer MXD64DA (Mixer Digital)
₫280,000,000
Length, width and height: 910*515*248MM (length includes 6.35 input seat, width includes side plate, height includes machine leg;Knobs not included)
Net weight: 18.25kg Gross weight: 19.05kg Packing size: 1040*630*360MM
1, Input channel gain /+ 48V switch
1). Gain control
Adjust this knob to increase or decrease the input signal level. 2).48V phantom power button
Long press the button for 3 seconds to turn on the 48V power supply of the current channel and light it, indicating that the MIC jack has 48V voltage.
Note: Do not turn on the phantom power until you have connected the microphone.
2. EQ/ Equalizer
1). Equalizer parameter knob
Up to down means: gain, frequency and Q value.
2). Parameter equalizer button
The shortcut keys of the parameter equalizer are: treble, medium treble, medium, bass and bass (from top to bottom). After lighting the corresponding keys, match the three parameters on the left
Adjust the knob to adjust the EQ parameters,
Note: The EQ adjustment is only effective when the EQ switch (IN key) is on. 3/4, channel HPF/LPF(high and low pass filter)
1).(HPF) high pass knob/high pass switch
Adjust this knob to reduce the low frequency signal, HPF button is high frequency on and off. 2).(LPF) Low Pass Knob/Low Pass Switch
Adjust this knob to reduce the high frequency signal, LPF button is low pass frequency on and off. The high-low pass filter can be treated as a frequency divider
5. AUX channel signal delivery button In the push layer A or InB
The button light of corresponding auxiliary output flashes to indicate that the current push is in the state that the channel sends to the corresponding auxiliary output
The send size is controlled by the corresponding pusher or the on-screen send bar. 6, 10.1 inch high-definition capacitive touch screen
7. Eight user-defined buttons
The factory default function is the scene mode call key, which can be changed by user-defined key function
8. Talk Back
It can be used as an intercom function by setting any input or output channel 9, stereo input 1/2(ST1/ST2) control area
SEL selection key to access channel page, mute switch, monitor switch, and volume knob (equivalent to push rod)
10, digital input channel (MP3/ sound card control /AES input) 1).SEL channel selection key
The button lights up to indicate that a channel has been selected and that channel parameters can be edited.
2).ON mute switch
Digital channel mute switch, off when the channel is mute state, you will not hear the signal of the channel
3).PFL monitor switch
When this button is pressed, the signal will be output from the listener and the headset.
4). Volume knob
The knob currently controls the volume of the digital channel.
11. Multi-function knob
This knob cooperates with the touch screen for parameter adjustment
12. Connect remote network EXPAND button Expand
When the host local input and output is not enough to use, with a dedicated stage interface box, through the network cable connection, long
Press this button to connect. When the connection is completed, the button begins to blink, indicating that the connection is successful. At this time, you can connect in
The interface box is operated on the host machine to realize the remote audio expansion and control of input and output
13/14. Enter the page-turning button /GEQ mode button
Input/output channel push page turn button
In -A When this button is on, the push control corresponds to the input channel level of the first layer. In -B When this button is on, the push control corresponds to the level of the second input channel.
GEQ- This button is effective when selecting the output channel. When the button is on, the push controls the gain of the output equalizer.
15. Right side push
For four-way effect channel and auxiliary output main output level adjustment (electric push)
16. Quickly invoke the first four scene modes /DCA marshalling Settings /TAP effect beat buttons 1).Click the corresponding button to quickly invoke the scene parameters, and long press to quickly save the parameters to the corresponding scene
2).Click to edit DCA marshalling. Set DCA marshalling by marshalling corresponding input/output channels 3).Short Delay Medium Delay Long Delay Is the beat effect, click Tap to change the echo delay time
17. Input channel pushers
Used to control the level of the current input channel (electric push)
18. PFL monitor switch
When this button is pressed, the signal will be output from the listener and the headset
19. Channel guide small display screen
This small screen will video display the current channel push volume, name, level signal and other information
20、ONThe mute switch
Channel mute switch, off the channel will be in mute state, you will not hear the signal of the channel
21、SELChannel selection key
The button lights up to indicate that a channel has been selected and that channel parameters can be edited
22、DCASend button
Click the button to set the DCA marshalling group into which the currently selected channel should be marshalled
23、FXChannel signal delivery button
Pressing the button to start flashing indicates that the pusher is in the state of the signal level sent to the FX effect channel by the corresponding channel
The send size is controlled by the corresponding pusher or the on-screen send bar
24、GATE/Noise of the door
This knob can adjust the threshold size of the noise door, and the IN button controls the opening and closing of the noise door
25、COMP/Pressure limiting device
This knob can adjust the threshold size of the limiter. The IN button controls the opening and closing of the limiter
Hãy là người đầu tiên nhận xét “Mixer MXD64DA (Mixer Digital)” Hủy
Sản phẩm tương tự
Create Audio Foundation ( CAF)/Italy
Create Audio Foundation ( CAF)/Italy
Create Audio Foundation ( CAF)/Italy
Create Audio Foundation ( CAF)/Italy
Create Audio Foundation ( CAF)/Italy
Create Audio Foundation ( CAF)/Italy
Create Audio Foundation ( CAF)/Italy
Create Audio Foundation ( CAF)/Italy


Đánh giá
Chưa có đánh giá nào.